By
By  It's not often that office dwellers get out and actually do the work we talk about all day long. I work in marketing for Bartell Global, and before working here, I never knew that the floor demolition industry really existed to the extent I do now.
So when I had the opportunity to go out and remove some flooring for a friend of mine, I decided to give it a try. In this blog, I wanted to highlight some of the things I learned using a Ride-On Floor Scraper and Walk Behind Floor Scraper for the first time. Hopefully you can learn from some of my mistakes and things I found.
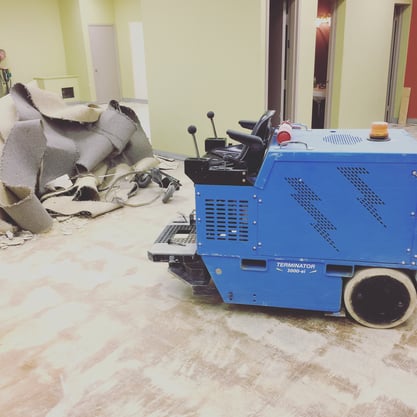
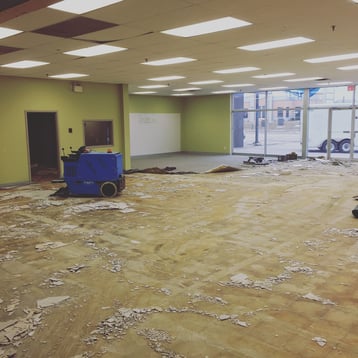 The job that I was working on was about 2500 sq ft. of mostly VCT, but there was also an area of carpet. The flooring was probably 10 years old by the looks of it. Most of the 2500 sq ft. was a large open area, but there were also 3 smaller rooms that we used a walk behind floor scraper in. We could have fit the ride on scraper in them, but because we had 2 people, we decided to go that way. Having some knowledge of the type of tooling that would be best, I was using a 13" notched blade on the 26" jaw. The reason I was using the 26" jaw was because it has the scoop on the back which helps to deflect debris from going under the unit. I would highlight recommend using the 26" jaw whenever possible as it can hold multiple blade sizes. So now that you have some background information, lets get into some of the things I learned when using these floor scrapers.
WATCH OUT FOR EXPANSION JOINTS AND STICK UPS
I learned this very quickly and the hard way. It's pretty exciting when you enter your first pass of removal. Right as you're cruising along thinking to yourself, "How did I become a pro so fast!?" you slam right into an expansion joint and damage your blade. That brought me right back down to reality. Before some of the flooring is off you can't see the expansion joints, but once you have uncovered them make sure that you cross then on an angle so that you don't get your blade stuck in them. Not only will you waste money in damaging your blades, you also are wasting time by needing to back up and get over the joint again. Plan out your removal pattern as best as you can to avoid getting stuck in these joints.
Stick ups are a similar problem, but you can normally find them in the floor before you begin removal. It is helpful to go around and circle them with a marker or something that you can see when operating the floor scraper. Depending on the ride on floor scraper that you're using, you may be able to get right up beside the stick ups, but some units are harder to maneuver. Know your machine limitations. If the controls are not sensitive enough, you can removal the small piece of flooring around these stick ups later.
REMOVE IN A LOGICAL PATTERN
Before I began to remove the floor, I didn't really think about what was the best pattern to do so. I kind of just started taking up the flooring. This comes back to bite you because you end up spending a lot of time thinking about where to drive next or having to go back and get a spot you missed later on in the job. I'm not 100% sure what the actual answer would be here because it would depend so much on the type of room you are in. This was one area that I think I wasted a lot of time in.
THE SWEEPER IS YOUR BEST FRIEND
The guy with the broom seems to always get pushed aside. (Ok, I know that was bad. I just had to.)
Anyways, when you are operating the floor scraper, the cleaner things are the easier it is for you to continue taking up flooring. It is almost essential to have someone with you who is sweeping debris not only into a pile for easy clean up at the end of the job, but also keeping debris away from the scraper. As you take up flooring, it can slip under the machines and cause a bumpy ride. As you drive over material it can alter how your blade is sitting on the ground and make removal less effective in some cases.
Depending on the type of material you are removing, the sweeper can also save you tons of money in repair costs. For example, if you were removing tile those shards can really damage the wheels on the scraper. As these parts are not cheap, you want to make sure that you avoid running over this kind of stuff as much as possible. The sweeper keeps your path clear and makes clean up at the end of the job much easier.
EXPERIMENT WITH DIFFERENT BLADE PITCHES
The pitch of the blade is one of the most important factors when removing flooring. If your pitch is not correct you will either glaze over the material or potentially gouge the slab. I found that I needed to try out many different pitched depending on where in the floor I was and how tough certain areas were to remove. The pitch changes throughout the job as well. Don't feel like you have to keep it in the same place the whole time. It's crazy the difference in removal ability by just adjusting the pitch slightly.
Depending on the type of ride on floor scraper you have, there may be multiple ways to adjust the pitch. Try out some different combinations to see which is best for the job that you're working on.
CONCLUSION
While there was a lot of things I learned when removing flooring for the first time, these 4 things would have helped me be more productive if I paid attention to them before starting. If you're new to using these machines here are a few key take-aways for you:
- Using a Ride on Floor Scraper is actually really simple (with basic instruction)
- The difference between manual removal and removal with a floor scraper is night and day
- Take some time to think through the removal before starting
- What tooling is needed?
- What is the best way to approach the removal? (the pattern)
- Where are the stick ups?
Let us know some of your experiences and some tips that may be helpful for people just getting into the business. Happy removal.