7 unexpected results of polished concrete.
 Have you ever received a fully gift wrapped CAR as a gift?!?
Nah! Me neither...
But wouldn't it be awesome?!!!
Can't you just imagine looking at this huge gift sitting in your driveway, all wrapped up, with a huge bow and ribbon around it? What could it be? Oh! You have a pretty good idea what's inside! You've told everyone what you wanted, now here it is - a huge present the size of a car sitting in your driveway! And it's even in the shape of a car! I mean come on! ... What else could it be?!! Your heart starts pounding with anticipation just looking at it. Oh Yeah! This is gonna be fun!
 Now... picture yourself running over to that huge present and opening it to reveal a beautiful 1968 Shelby Convertible in MINT CONDITION! WOW! The style, the power, the color, the shine, the beauty... it's amazing! This is the best day of your life!!!
Okay, reality check! ....
 Now! ... Imagine that same experience, but instead of revealing a beautiful car... you reveal a very lackluster junker like this one. Ugh! Well, at least its clean and reliable - but it's old, used and frankly a little worn out. And it sure doesn't carry the shine or impact of the sports car!
Needless to say... you'd be pretty disappointed after opening this present in your driveway. Now, I'm sure you've got nothing against any car as a gift (me neither) - it's just not what you were expecting... right?
Polished concrete is a lot like unwrapping that “car present” in your driveway. When you start the process of polishing a floor - you look at the floor as one big “present” that is hiding that beautiful sports car inside it. And its exciting. Hopes of this project turning out gorgeous are really high! And you could be right... You just need to “unwrap it” to find out if it is!
So you start the process... but when you get to the end of your polishing job you find out you just opened the “Junker Car” floor! This is clearly NOT what you were expecting. And consequently the end result did NOT match your expectations of what you thought it was going to be.
Now, I told this story because it “drives home” (no pun intended) a really important truth - When you polish concrete - you are polishing what is already there! You can't make the floor into something that it isn't.
If it contains a “beautiful sports car” of a finish - then you can reveal a beautiful floor. But if it contains an "average lack-luster car" finish - then that’s what you will get as your final floor product.
So the reality is... while MOST concrete floors end up looking GREAT when they are finished, there are some concrete slabs that turn out totally unacceptable (at least to the customer anyway). When this happens - only a polish-able overlay will most likely be the only acceptable solution to get customer satisfaction.
Okay - let's get practical!
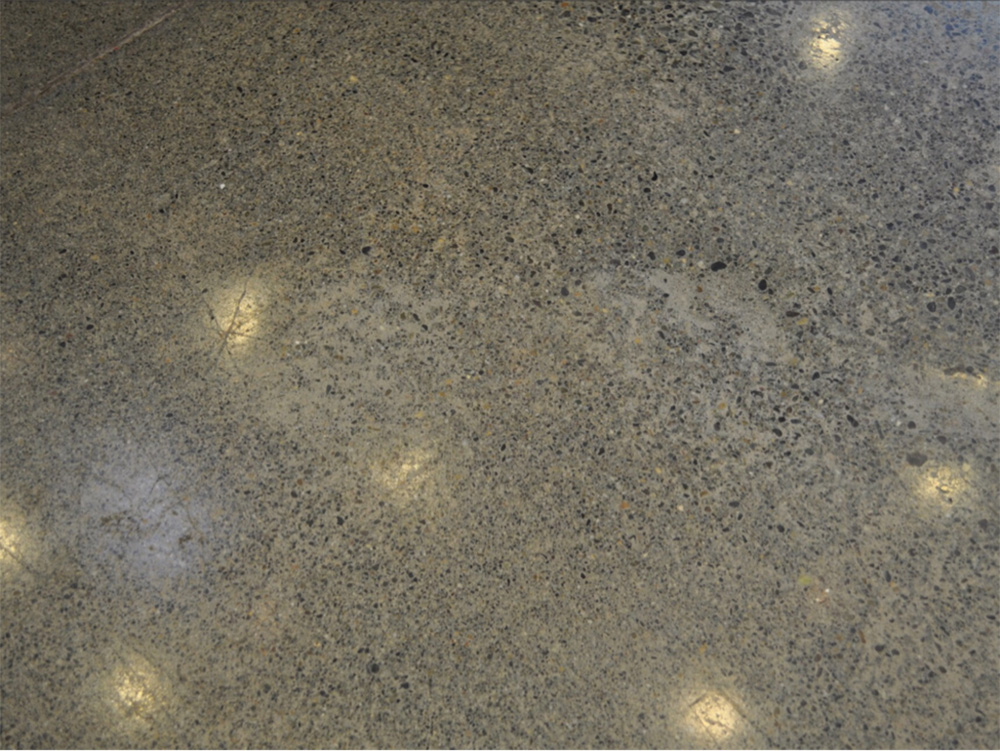
I took some time to put together some images I have of floors that — when polished — had unexpected outcomes. Or shall we call it “concrete personality”? Because some results are self-inflicted, and some simply reflect the unique characteristics of the slab. Let’s take a look....
1. Are you afraid of GHOSTS?

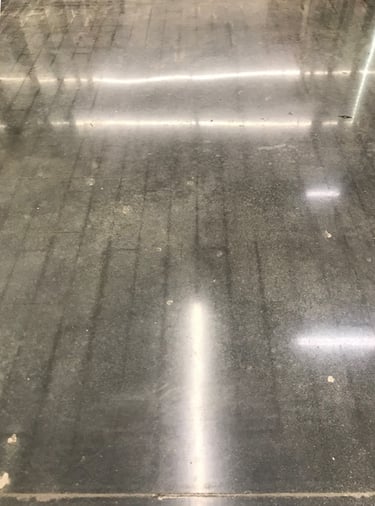
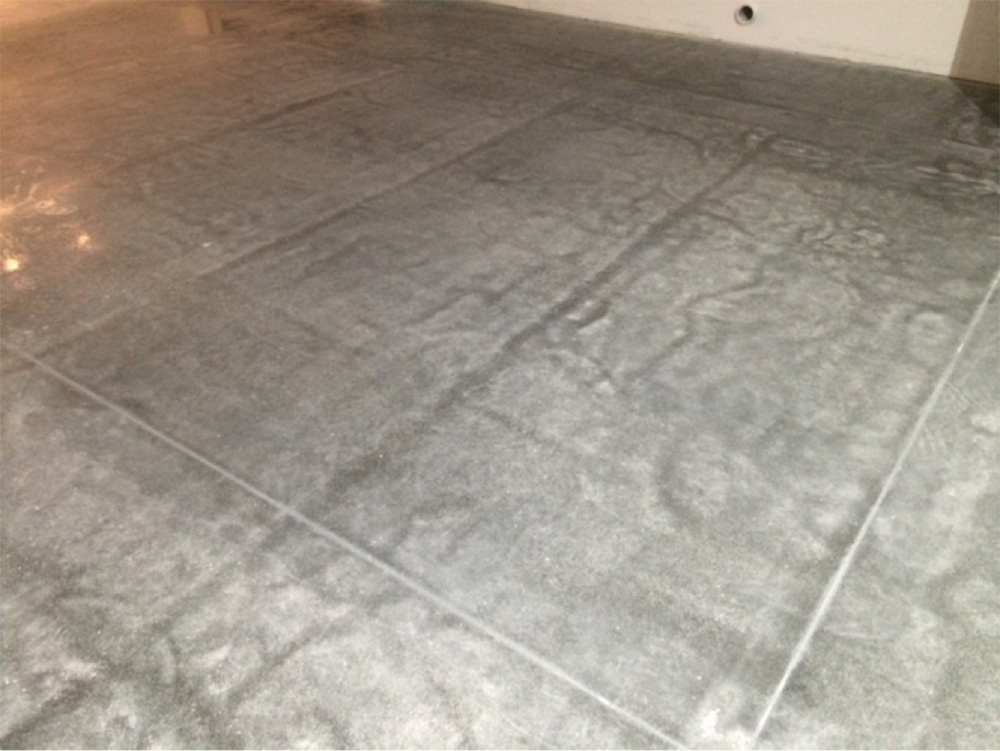
The lines you see on the floor here are commonly called "Ghosting". Both of these concrete slabs had flooring installed before it was removed and then the floors were polished. VCT (Vinyl Composition Tile) is the example in the first picture and LVP (Luxury Vinyl Plank) in the second.
When polishing concrete that have had these types of flooring installed before, you need to know that you will ALWAYS get some degree of ghosting. Ghosting doesn't affect the performance of the floor (a polished floor hardens and seals the concrete surface) - it is strictly a cosmetic issue. So it may be a perfectly 'good', polished floor in the end. It just doesn't look like you (or your customer) thought it would.
This isn't an easy thing to detect at the beginning of the grinding process. Often contractors will grind the floor with 40 grit metal diamonds, followed by 80 grit and then followed by "Transitional" diamonds. After working hard on these three grinding steps - it's easy to believe the ghosting would have been removed, Especially since you most likely won't see it in the early stages of the grinding process.
But rest assured, when you start to use your higher grit diamonds for the final stages of the polish, it will still be there waiting for you! And NO amount of grinding will remove it. Why? Because it is just too deep! Understanding how it got there might help. Evaporating moisture from the concrete will always be drawn to the seams of the flooring placed on top, bringing minerals and salts to those narrow areas and leaving them more concentrated (and permanently discolored) where the moisture escaped from between the seams.
So what do you do?
It's always wise to do a test or 'sample' area on a potential problem area of the floor before you begin the entire polishing project. Why? Because it let's your customer see a sample of what they can expect the rest of the floor to be like. And it prepares them for the possible outcome BEFORE you start. If they don't like the results of the test - you can do your best to explain why the floor is reacting the way it is. But then THEY can choose to proceed with the polish - or not! If they don't like what you've uncovered - they now have a choice to choose a different floor covering approach - and it hasn't cost them as much money as it would have if you had done the entire floor!.
Managing customer expectations ahead of time greatly avoids customer dissatisfaction, and in Concrete Polishing... THAT is the name of the game!
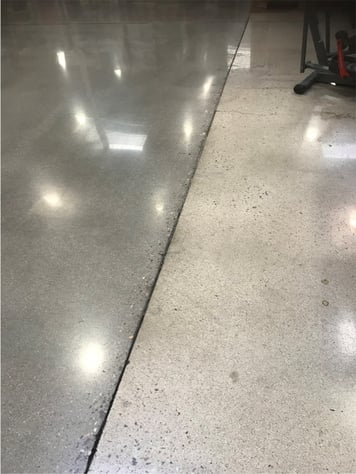 2. Two tone concrete
Here is an example of two separate pours in the same room, resulting in two different colors! This is probably the result of the contractor getting concrete from two different plants (or locations). If this slab was covered by flooring or really dirty when the job was bid, you could have missed or overlooked the subtle color change in the concrete. And to make this job even more challenging - the hardness of these two slabs are likely different as well. In most cases this means the possibility of requiring different tooling to complete the project, resulting in additional costs to you.
3. I know where you've been and when you were there!
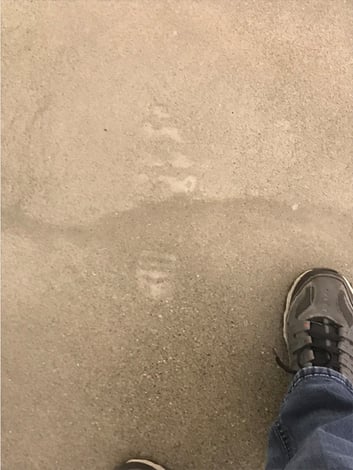 In this image, you can see a light colored footprint. The only trouble is this footprint wasn't there when you started your polishing job - it just appeared as you were grinding! It's IN the concrete. What happened?
Well this probably resulted when the concrete floor was initially being poured - then someone walked across this floor when it was still "green" (wet, not fully set) and as a result, they left impressions in the cement. If you didn't see this in the concrete floor before you started grinding then what most likely happened after they stepped in the concrete - they noticed what they did and quickly covered over the footprint impression with the cream of the cement.
Now what? If you were doing anything with the slab other than polishing it, it wouldn’t matter at all, but because you are polishing it - it is now visible and it will stay in the final polish. Can you grind the imprint out and get rid of it? Possibly. But who knows how deep the impression is? And not only that - if you continue grinding in this same area to remove it, you will expose more aggregate in doing so. That means you'll most likely have to grind that much off the entire surface to keep the stone aggregates all the same approximate size. And that is probably more work than you spec'd out!
4. UGH, Trenches! a picture tells a thousand words!
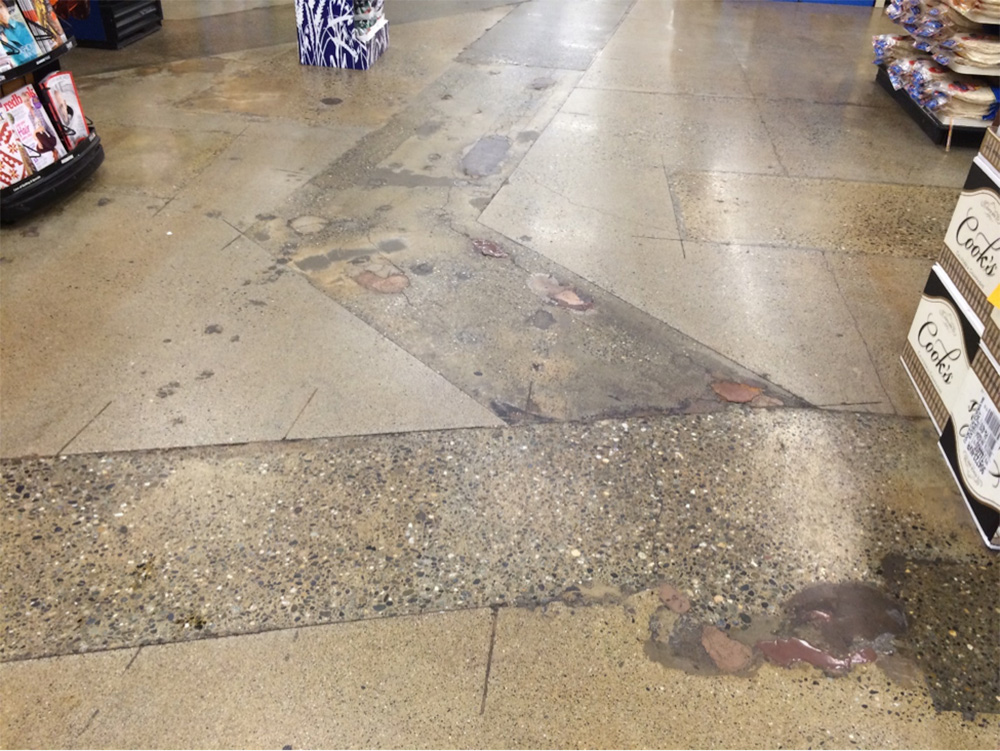
A nice polishable overlay would have been a much better solution here. Trenches are always going to be obvious in the end, and are usually ugly. Most end-users recognize this, but this is an especially nasty one. As terrible as it looks, it is still performing fine: it is a densified, dustless floor. It’s just not aesthetically pleasing.
Here are a few photos of problems where the contractor was at fault:
5. Don’t shoot yourself in the foot.
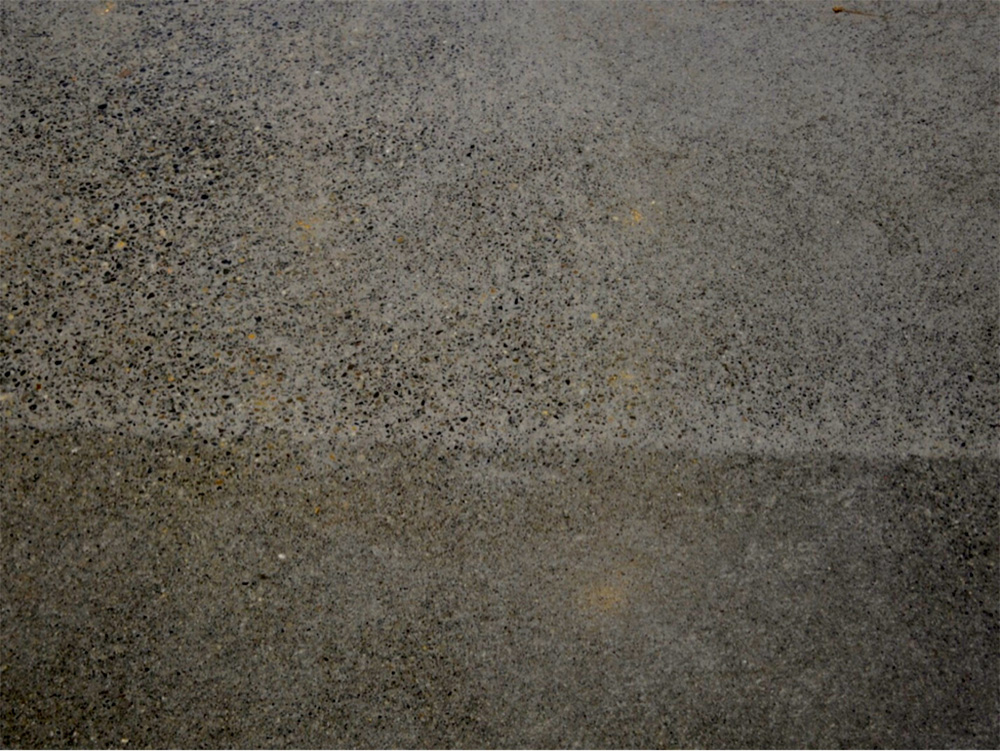
This one is interesting... the contractor finished a polishing project and immediately covered just the walkway with Masonite to protect the surface and left the rest exposed for quite a while. When the Masonite was removed, the floor was two different colors. In time it probably got better but the lesson is this: it takes months for the complete effect of densification to complete, and the concrete is changing all that time and can be affected by many variables, including what is placed on top of it. So if you need to protect the floor, protect the whole floor. And never use products with writing on it (like “house wrap”) as anything printed on it can transfer to the concrete surface.
6. Don’t scratch it!
What’s wrong here? Can you see the scratches in the light reflection? The contractor didn't completely remove what was probably 40G scratches. The mistake often made is this: you see the scratches, but you figure you will get them with the next step, but if you can’t get them out with the tooling you have on now, it will just be harder to remove them at the next step, as you will be moving to LESS aggressive tooling. The scratches will become more pronounced as you produce a higher and higher shine.
7. Sometimes you just walk away shaking your head.
This is an interesting and somewhat baffling image. To give you a little background, this floor was poured in a high-end garage on a difficult-to-access island north of Seattle so one thought was that (being in western Washington) the rain must have played a part. Perhaps they poured the slab and covered it with tarps making for an inconsistent surface, porous in areas and not in other areas. He assured me that this isn't what happened, so we are still baffled! The floor eventually monolithified and looked much more consistent, a lot better, but took months.
Let’s end on a positive note,
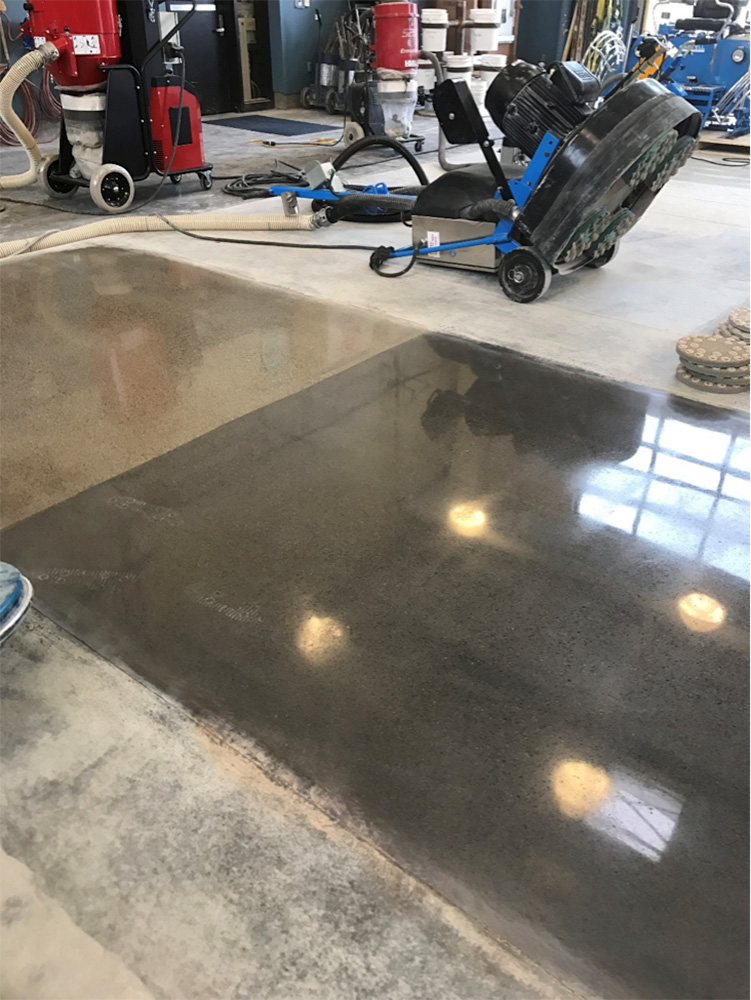
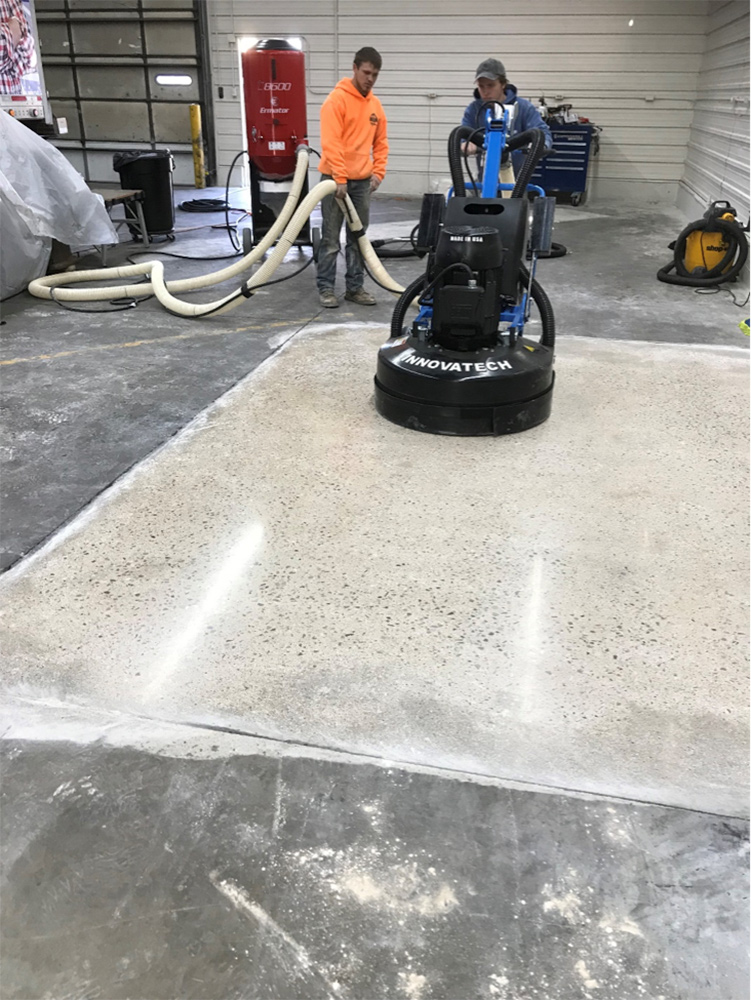
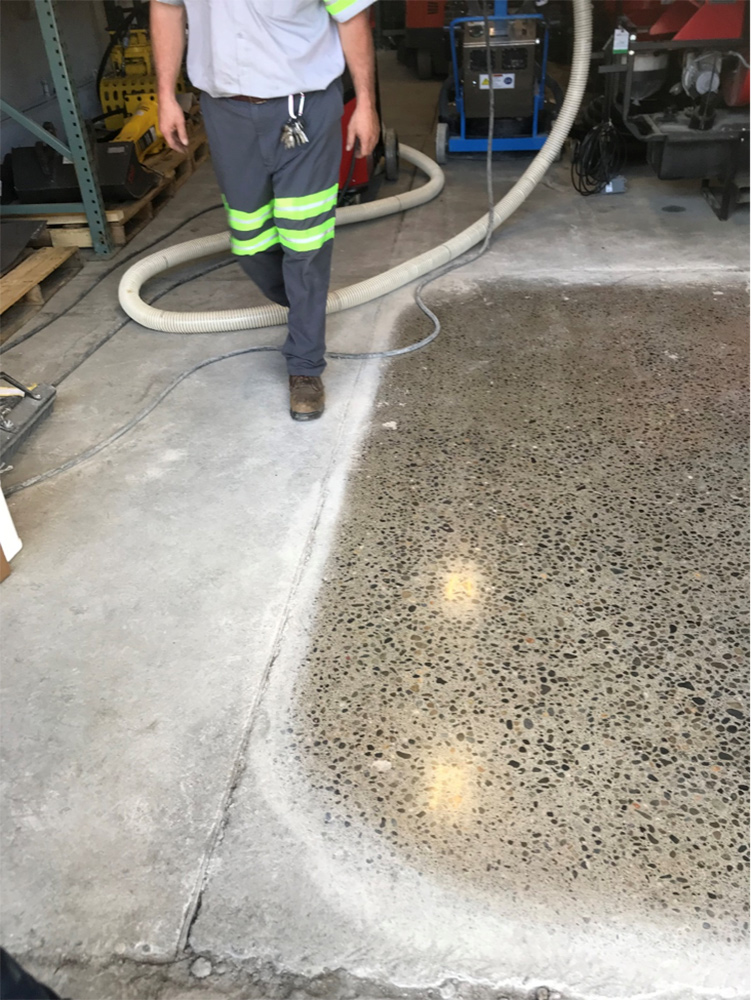
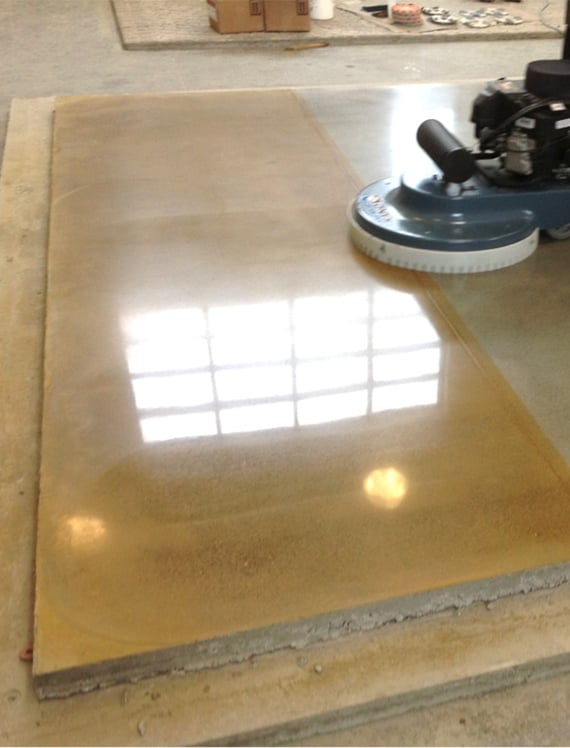
Here are a few shots of some really great outcomes, showing off my favorite part: the transformation from an ugly piece of concrete to a beautiful floor.
 |
 |
|
Mason’s Union Training Hall in Seattle WA, great reflection! |
I like this pic because it shows the old ugly concrete transformed to a terrazzo-like finish. |
 |
 |
|
What you can do to the concrete in an ugly old shed. |
Nice reflection here as well. This was achieved using the Predator P-3200 four headed grinder-polisher by Innovatech using the iShine pads. |
To sum up...
Concrete — especially polished concrete — is really cool! It provides a surface that is beautiful (most of the time), low maintenance, dust free and eco-friendly. It’s as green a product as you can get, if you think about it. With polished concrete, you are manufacturing nothing, you're throwing away nothing, you are just changing what is already there. And the chemicals you use to densify the concrete like Sodium and Lithium are natural occurring substances. Even the concrete itself is “green”, when mixed with waste-products like fly ash, slag and silica fume that would otherwise go to landfills.
That said, just like the personality a beautiful Shelby and an aesthetically challenged Pacer, the personality of a concrete slab is going to be different on every job, and can even change from one part of a project to another. Sometimes though, as the photos above show, not every personality is aesthetic, but here is an important point: even the ugliest floor can perform beautifully, and that is often what counts most the end user.
I think the most important lesson that we, as contractors, know these variables, but the end users often do not. It is VERY important to educate our clients so they understand limitations and possible outcomes so we can help manage their expectations.


 By
By 