By
By
Shot Blasting is a type of surface preparation that is a bit underrated. Over the past few years in certain industries, there has been a push towards the misconception that Grinding is better than Shot Blasting.

In some circumstances this is definitely the case, but Shot Blasting is incredibly beneficial and we’d even go as far to say that it is necessary for many floor preparation situations. One of the reason’s many users may have had some difficulty with Shot Blasting in the past is because of the lack on education on how to use them effectively. Understanding the basic concepts of Shot Blasting, like what type of shot to use, and the appropriate amount and mixture, are all very important in removing epoxy, glue or paint, and getting the exact profile you’re looking for. Once you understand these basic concepts, you’ll see just how advantageous Shot Blasting is. In this blog, we’ve broken down the important points so you can see how easy it really is.
UNDERSTANDING SHOT
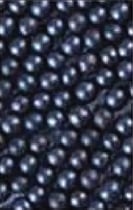
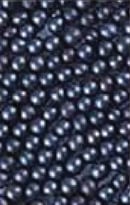
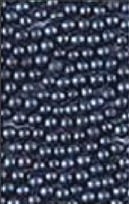
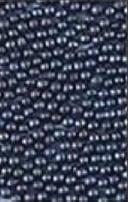
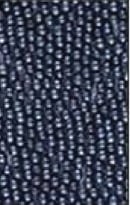
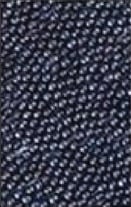
When talking about “shot” we are referring to the small steel balls that you put on the blast wheel in a Shot Blasting machine. – For those who may not know, the Blast Wheel is the part of the machine that fling the shot onto the surface you’re blasting.
There are 10 different sizes of shot for you to choose from depending on what type of profile or texture you’re looking to give the concrete, or depending on if you’re trying to remove glue, epoxy or paint. The most common sizes, and the sizes we suggest using with our machines, are S330 to S780.
|
S780/SS2.5 |
S660/SS2.0 |
S550/SS1.7
|
S460/SS1.4 |
S390/SS1.2 |
S330/SS1.0 |
ABRASIVE SHOT SIZE APPLICATION
S780
- Removal of thick coating, but will leave a heavy texture or aggressive profile
- Rapid method of exposing aggregate for screed application
S660
- Removal of thick coating
- Quick method of exposing aggregate
S550
- Removal of thick paint coating
- Heavy texture for screed
S460
- Removal of medium thickness coating
- Medium texture for self-levelers
S390
- Light to Medium texture for thin coating
- Removal of thin coatings
- Cleaning dirty concrete
S330
- Light texture for sealer or very thin coating
REMOVAL
For Glue or Epoxy, you’ll want to use a small to medium size shot, or even mix a bit of both. Using too big of shot will take up the glue in big pieces and could end up clogging the machine.
For Paint, you’ll want to use medium to medium large size- usually mixing sizes so you can get the profile you want.
Shot Blasting is not recommended for removing hardwood, carpet, or tile. Check out our Blog page on our website for more information on other types of flooring removal.
UNDERSTANDING TEXTURE
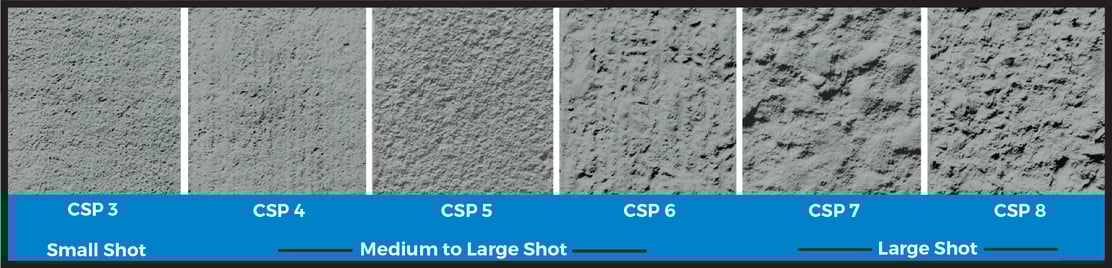
Depending on your geographical location, you may have heard different terms used for the various profile texture you can achieve by shot blasting. The CSP or Concrete Surface Profile guide measures concrete surface texture from smooth to rough using a numerical rating system, with 1 being the least textured and 9 being the most aggressive texture. Generally, you can achieve a CSP of 3 through to 8 with different size and amount of shot, shot mixture, and travel speed.
THE 3 KEY FACTORS
1. Shot Size
The size of the shot you use will have a definite effect on the profile or texture of the concrete. For example, if you are looking to create a concrete profile for inside a public building, you generally want something smoother, or a lower CSP, so you can use a smaller sized shot. However, if you’re completing sidewalks or other surfaces that require a non-slip profile, you’ll want a larger sized shot or mixture of shot so you can create a more aggressive and textured profile.
2. Travel Speed
In addition to shot size, Travel Speed plays a significant role in the surface profile. Try and think of how the shot is being flung with intense power toward the concrete – if you’re standing in the same spot or moving very slowly, you’re going to end up with a deeper more aggressively textured profile. On the other hand, if you’re traveling more quickly, the shot doesn’t have the same opportunity to hit the concrete repeatedly in the same spot. Therefore, your profile will have somewhat of a smoother texture in comparison, even if you used the same size and mixture of shot.
3. Amount of Shot (Load)
The load refers to how much shot falls on the blades. You control this by opening or closing the shot lever and butterfly valve. The more you open the valve, the more shot falls onto the blades, and vice versa. The larger the load size, or the larger amount of shot you have falling on the blades, increases the amount of of shot beating up the concrete, creating a more textured profile, and vice versa.
Once you know what you want the concrete profile to look like, you can easily figure out the best way to achieve it. Finding the best combination between shot size, amount, and travel speed is key. It is important to take a second and find the right mixture of the three key factors to ensure a relatively even profile. If you rely too heavily on one or the other, you run the risk of having your profile turn out uneven or patchy.